Spring Wreath – Simple Spring Decor Idea
Brighten up that ole’ front door of yours in no time with this simple and fun DIY Spring Wreath Home Decor idea! This spring inspired wreath is perfect!

Spring Wreath – Simple & Fun Spring Home Decor
Hey y’all! This is Bev and I create unique DIY wreath tutorials on my blog,
Round And Round DIY Wreaths. I am so excited to share this really cute spring wreath tutorial with you today. Follow along and see what fun you can have crafting this colorful creation for your front door.
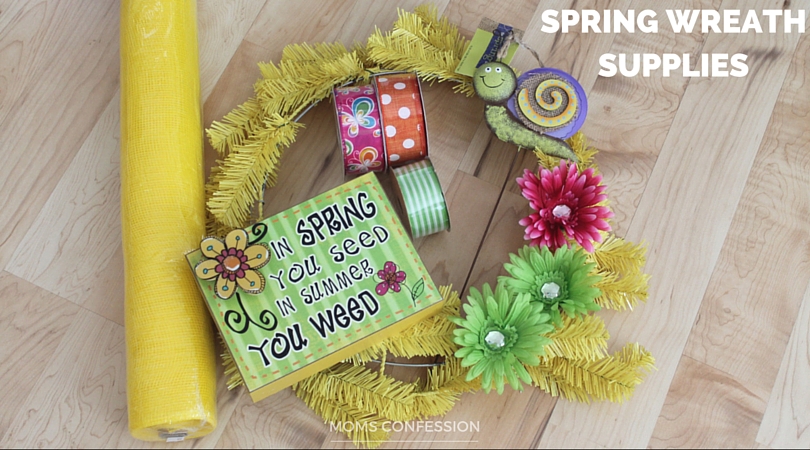
SPRING WREATH SUPPLIES
You will need the following supplies from a craft store:
- 1 roll of yellow deco mesh
- 1 yellow work wreath form
- 3 rolls of 1 1/2″ ribbon (orange/white polka dot, green/white stripes, multi color print)
- 3 jeweled daisies
- 1 metal snail pick
- spring inspired sign
- floral wire
- glue gun
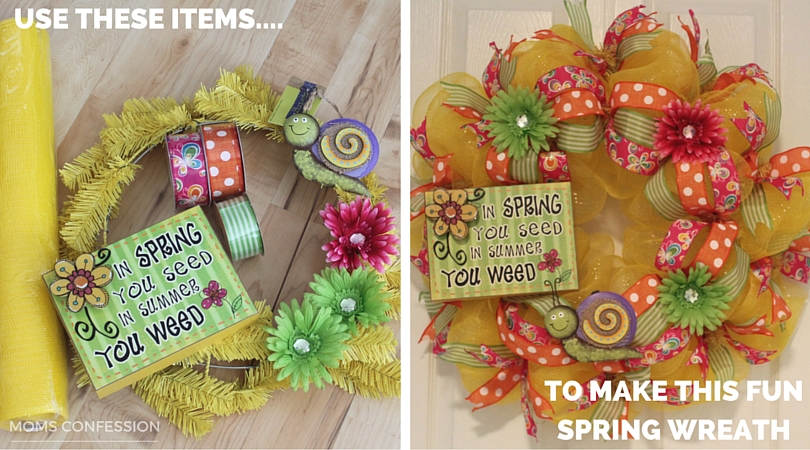
SPRING WREATH INSTRUCTIONS
1. Our first step is to add the mesh to the wire wreath form to create our wreath base. Starting on the inside, gather the mesh and place it in the wire sprigs on the wreath form. Tightly twist the sprigs around the mesh.
2. With the end secure, begin working your way around the inside ring , gathering the mesh and securing it to the wreath with the sprigs as you come to them. When you have circled the inside ring, move to the outside ring and continue all the way around.
3. Looks great! Now to add a splash of color. Take the 3 ribbons and place them together in the wire sprigs on the inside ring. Twist the sprigs around the 3 ribbon ends.
4. Add the ribbon all the way around the inside ring by gathering it every 12″ and securing it to the wreath with the sprigs. Crisscross the ribbons as you go.
5. Next cut pieces of each ribbon pattern in 12″ strips. You will need to cut enough of each ribbon for each of the sprigs on the outside ring of the wreath. Typically this would be 10.
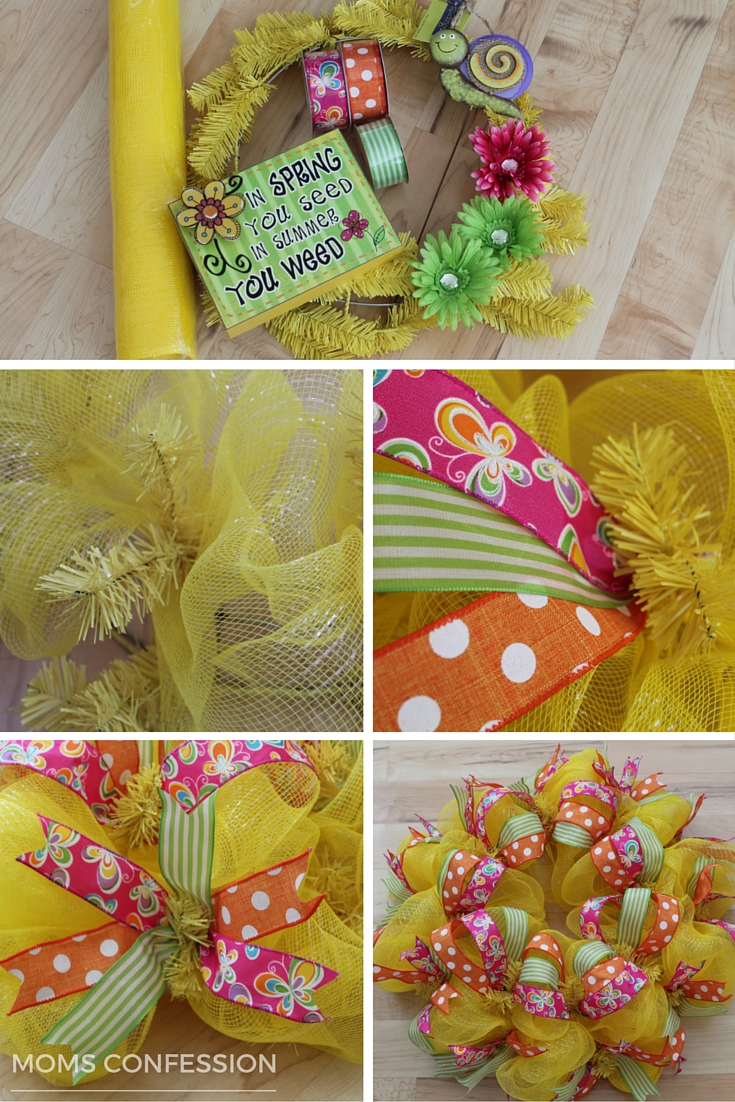
6. Take 1 of each ribbon pattern, pinch them in the middle and attach them to the wreath using the sprigs. Remember to add this ribbon trio to every sprig on the outside ring.
7. The next step is to add a few pieces of spring flair to your design. Take a piece of floral wire and wrap it around the hanger already attached to your spring sign.
8. Run the wire sown through the mesh and wrap it around the frame of the wreath.
9. Add a dab of hot glue to the back of the daisy heads and place them on the wreath. After removing the stem from the snail, a dab of glue will hold it nicely in place as well.
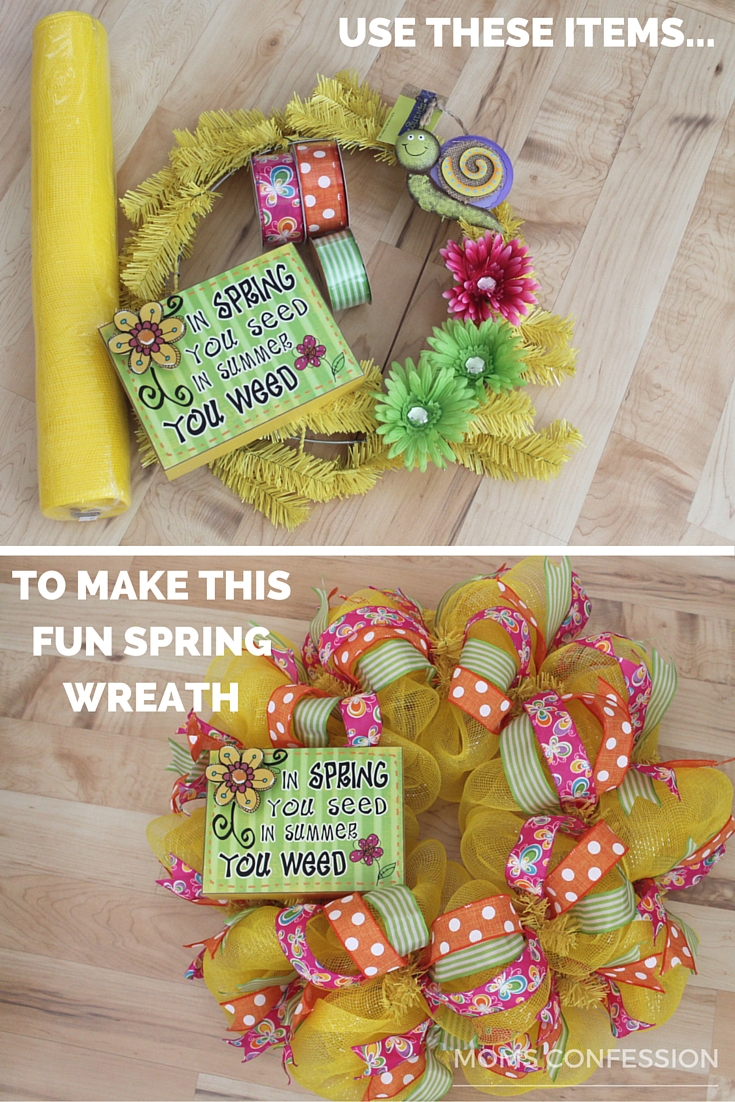
So cute! This bright and colorful DIY Spring wreath will liven up that ole’ front door of yours in no time. Thank you so much to Kristi for hosting me and I hope you enjoy the tutorial as much as I did!
PIN THIS SPRING WREATH TUTORIAL FOR LATER!


