Simple No-Glue Halloween Wreath
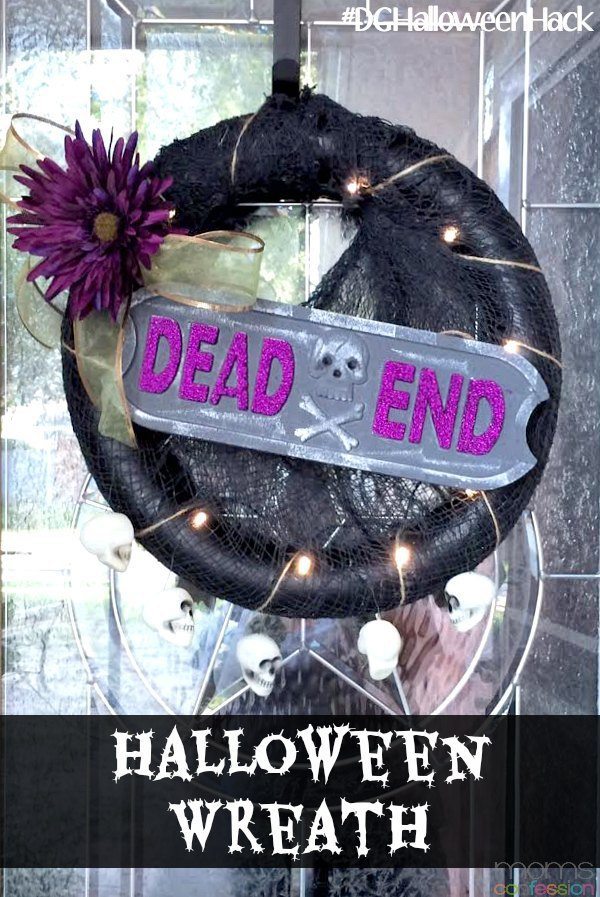
This simple no-glue Halloween wreath is so easy to make and is also completely customizable for your Halloween theme. Make one today, it’s so simple!
Hello Halloween! And hello to holiday decorating! Between Halloween and Christmas, I have the hardest time choosing my favorite holiday since both are fun and festive in their own way. Just like Christmas, I love creating a new wreath for the season without spending an arm and a leg.
My budget is always on my mind when it comes to decorating so I often seek out items from Dollar General to keep it in order. One thing about shopping at Dollar General is that you have to keep an open mind and also think outside the box (especially when you are creating DIY projects).
When I went to the store last week to pick up wreath supplies for Halloween, I knew I would have to think outside the box. I already had a generalized idea of what my wreath would look (I’m a processor and visualizer) like this year so I kept that in mind.
After a little bit of thinking and visualizing everything together…I knew I would have the best Halloween Wreath on the block (with the exception of making a second one for my mother!) :)
Check out all the Happy Haunting items this Halloween at your local stores, they have so many great items for the season! So let’s dig in and make an awesome Halloween Wreath together!!
Halloween Wreath Supplies
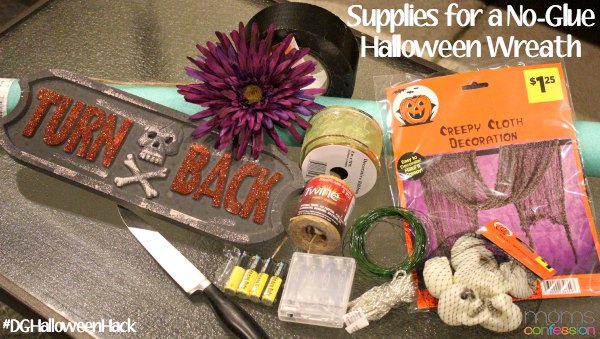
- Pool Noodle
- Black Duct Tape
- Black Creepy Cloth Mesh
- Jute Twine
- Strand of 10 Battery Powered Lights
- Batteries (check lights to see what size – mine took AA)
- Gardening Wire or thin wire
- Foam Halloween Sign (they have 3 options: Turn Back, Dead End or Haunted House)
- Wire Ribbon
- Clip On Flower
- Plastic Skulls
- Scissors
How to Make a No Glue Halloween Wreath
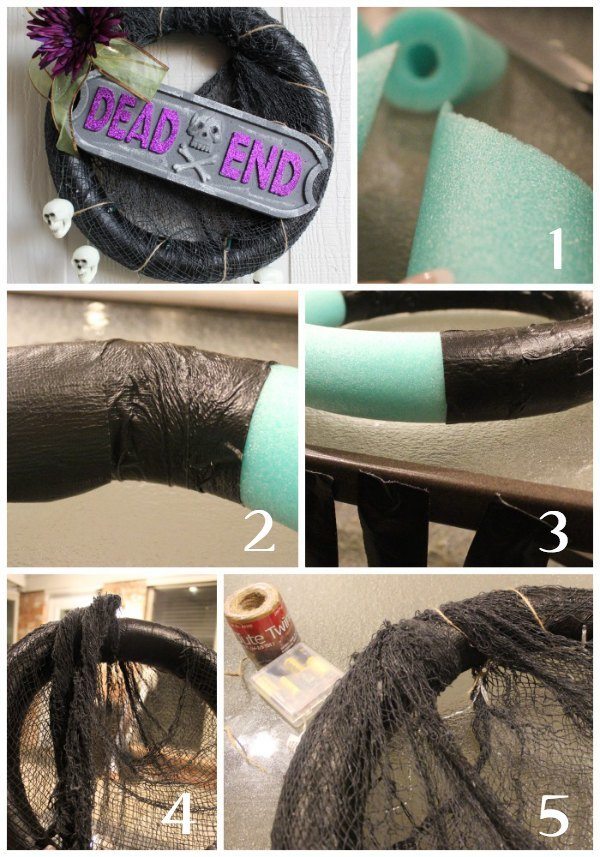
1. Cut pool noodle at an angle opposite each other to form a circle.
2. Fold over ends of the pool noodle and secure the ends together with duct tape to form a wreath. (This works easier if you have someone help you get started.)
3. Cut about 30 strips of the duct (approximately 6 inches pieces) and wrap around the entire noodle (wreath form).
4. Fold creepy cloth mesh in half and drape it over the wreath form. Gather the ends and tie them together to secure it to the wreath.
5. Place lights in between both sides of the mesh inside the wreath and secure in place by wrapping jute twine around the edges in a diagonal form. Use excess twine to secure the battery pack for lights to the top of the wreath on the backside. (Make sure you can get to the on/off switch)
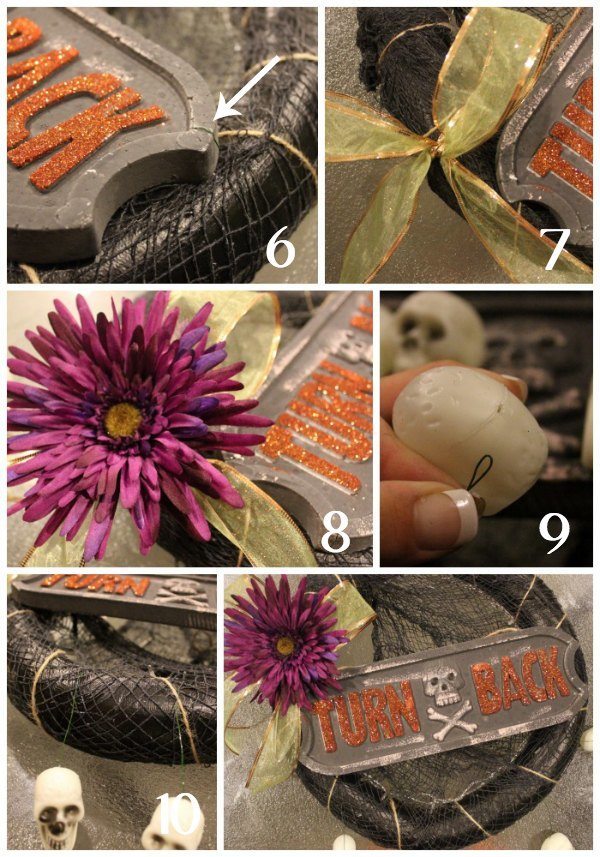
6. Cut a piece of the gardening wire to approximately 4 inches in length. Feed the wire through the foam sign and press through into the wreath form. After doing so, fold over the excess wire on the front side to clasp the sign in place. (see arrow in image)
7. Cut a piece of ribbon from the roll (about 1/3 of it or so). Tie a basic shoelace knot around the wreath and fluff the ends a bit to make it pretty.
8. Attach the clip on the flower to the ribbon bow and fluff the ribbon pieces again.
9. Cut 5 more pieces of gardening wire to approximately 4 inches in length again. Fold the end over (see #9 image above) and feed it through the holes in the plastic skulls. After the wire is inserted, pull up and to the side to straighten the wire inside (creating an L-shape) to hold it in place.
10. Fold the other end of the gardening wire over and poke it into the wreath.
- Total cost: $15.30 + tax
- Total time to recreate this Halloween Wreath: Approximately 30 minutes
Pin this Halloween Wreath for later and head out to your local Dollar General today to pick up your supplies!
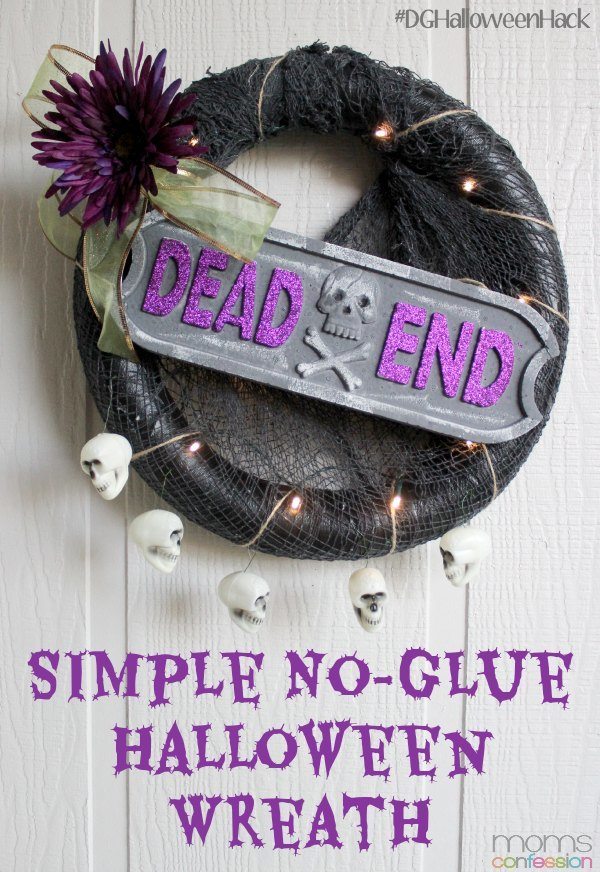

No Glue Halloween Wreath
Materials
- Pool Noodle
- Black Duct Tape
- Black Creepy Cloth Mesh
- Jute Twine
- Strand of 10 Battery Powered Lights
- Batteries check lights to see what size – mine took AA
- Gardening Wire or thin wire
- Foam Halloween Sign they have 3 options: Turn Back, Dead End or Haunted House
- Wire Ribbon
- Clip On Flower
- Plastic Skulls
- Scissors
Instructions
- Cut pool noodle at an angle opposite each other to form a circle.
- Fold over ends of the pool noodle and secure the ends together with duct tape to form a wreath. (This works easier if you have someone help you get started.)
- Cut about 30 strips of the duct (approximately 6 inches pieces) and wrap around the entire noodle (wreath form).
- Fold creepy cloth mesh in half and drape it over the wreath form. Gather the ends and tie them together to secure it to the wreath.
- Place lights in between both sides of the mesh inside the wreath and secure in place by wrapping jute twine around the edges in a diagonal form. Use excess twine to secure the battery pack for lights to the top of the wreath on the backside. (Make sure you can get to the on/off switch)
- Cut a piece of the gardening wire to approximately 4 inches in length. Feed the wire through the foam sign and press through into the wreath form. After doing so, fold over the excess wire on the front side to clasp the sign in place. (see arrow in image)
- Cut a piece of ribbon from the roll (about 1/3 of it or so). Tie a basic shoelace knot around the wreath and fluff the ends a bit to make it pretty.
- Attach the clip on the flower to the ribbon bow and fluff the ribbon pieces again.
- Cut 5 more pieces of gardening wire to approximately 4 inches in length again. Fold the end over (see #9 image above) and feed it through the holes in the plastic skulls. After the wire is inserted, pull up and to the side to straighten the wire inside (creating an L-shape) to hold it in place.
- Fold the other end of the gardening wire over and poke it into the wreath.

